
Hosting a Recorded Webinar allows you to relax while your presentation runs as smoothly as you recorded it previously (you can also edit the video after recording it). You can give the same webinar again and again. This will allow you to host webinars more often, allowing more people to attend.
If you’re wondering how to record a webinar in the first place then please click here.
It is recommended that whenever you host a recorded webinar that you also answer people’s questions at the end of the presentation.
A Webinar Containing Both a Live and a Recorded Section
You can choose to have only one portion of your presentation as a recorded video. This should allow you to, for example, have a live portion of the presentation together with a recorded portion. Both presented in the same webinar one after another.
It is Best To Let The Audience Know
It is best to let people know that they will see a recorded webinar of a portion of it. If needed, you can let people know that a real person will still be there reading their comments and replying to them.
Many people will see this as a plus. They get to attend a well-recorded webinar and have an expert answer their questions.
Using Virtual WebCam Software
Virtual Webcam software can be used to play recorded presentations through a virtual camera. The great thing about this technique is that you can use it with almost any web conferencing software.
Here, we will be explaining how you can use a free webcam software to play a video on a webinar feed hosted on TeamViewer. The exact instructions might be different for your webinar software but they’re all very similar.
You should be able to find the options fairly easily on your software.
How To Host Your Pre Recorded Webinar as a Re-run?
Please follow these instructions to play your pre-recorded webinar as a new one.
Install a free webcam software (in this case ManyCam) and start sharing the screen. Now, start TeamViewer and start a new meeting.
Your computer’s webcam might be selected as the default camera in the beginning. Instead, select “ManyCam Virtual Webcam” as the camera.
Click the box as shown below and click Media Files in the MmanyCam window
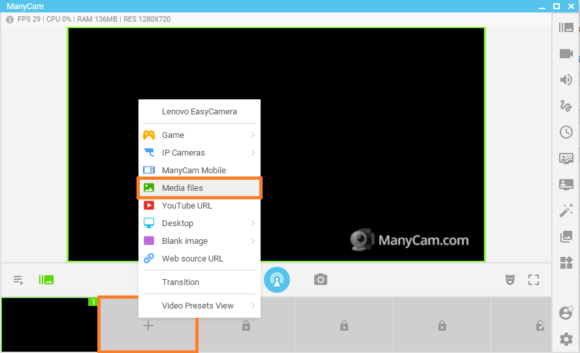
Select your recorded webinar video file to open it. A thumbnail of the video’s preview should appear in the box.
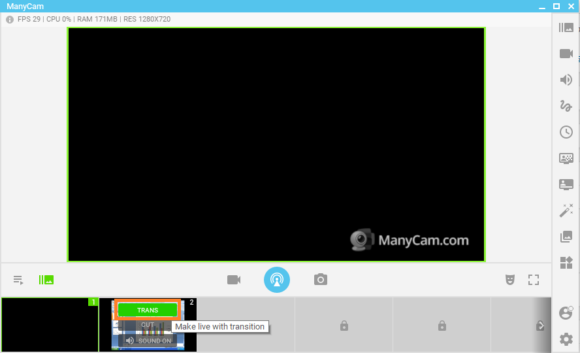
Now, hover over the second box to make more options appear. Click the button labeled Trans to transition to that screen. You should see the video playing with the audio in the ManyCam window.
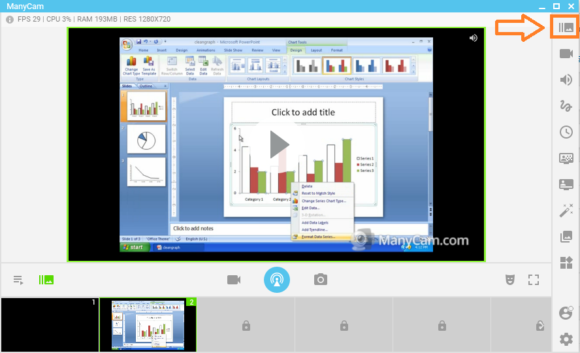
This is what your TeamViewer audience should see now. You can do this with pretty much any video conferencing software.
Thats it. You can click the button on the upper right corner to see more options. Click around and discover how you can take more control over the video being played.
If you liked this article then please let us know by posting a comment and please share this article on social media.
Have A Nice Day 🙂
Leave a Reply