
Formatting a picture involves cropping it or changing its visual style. Once you insert a picture, alter its appearance in PowerPoint 2013 by removing any unwanted areas. In addition to this, you may also find it useful to adjust color and to apply an artistic touch to graphics. Following How To tutorial explains how Formatting Pictures in PowerPoint 2013 works.
Crop an Image / Graphic
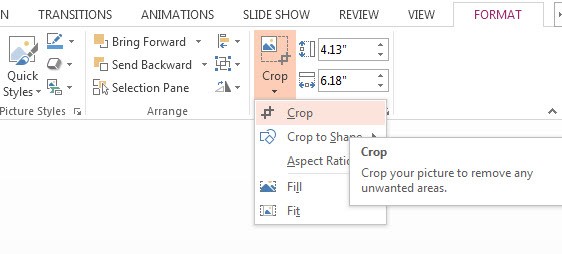
The term cropping refers to trimming the vertical and horizontal sides of an image or graphic. Cropping is useful, particularly, when you only need to include a portion of the overall image. To achieve this, first select the image. Click on the FORMAT contextual tab. The Crop button is included under the Size group. Select the Crop option from the drop down menu. Adjust the cropping handles to include the portion you want to keep. The picture is cropped.
In case you want to maintain the aspect ratio of the picture being cropped, hold down <CTRL> + <SHIFT> as you drag.
Applying Visual Effects to Images / Graphics
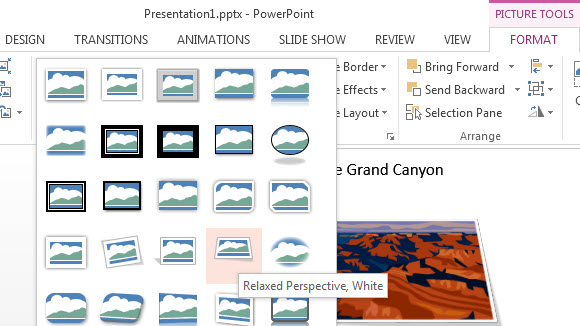
PowerPoint 2013 comes with predefined styles that you can apply to images and graphics to alter the way they appear on the screen. To apply the effects, select the image and navigate to the FORMAT contextual tab, located on the Ribbon. From the Picture Styles group, select one of the predefined styles. The first row of styles is displayed in the screen below. To view all the styling options, click on More button.
Formatting Pictures in PowerPoint 2013 is a commonly used option. To access the formatting options, select the picture / graphic and click the FORMAT contextual tab. The Size group and the Picture Styles group provide the Crop and Styling options respectively. The instructions provided above are specifically for PowerPoint 2013, and these may vary for earlier releases. Download a free presentation template to practice editing.
Leave a Reply