
Ideally, people like to have only one object in a slide. In case the number of objects exceeds one, it becomes troublesome to align the objects with the text. In this free How To article, let us take a look at how to group multiple objects, making it easier to move them. A group of objects is treated as a single object. If you are familiarizing with objects, make sure you learn how to Insert ClipArt. Once you have grouped the objects, you may also want to take a look at how to precisely align objects in PowerPoint 2013.
Learn how to Group Objects in PowerPoint 2013 starts off by inserting objects into a blank presentation. Step 1 is to select objects. This can be done by two ways. Method one is visible in the figure below, which shows three objects selected simultaneously if you Left Click each object, while holding the Shift button on your keyboard. The other method involves highlighting the objects with a mouse.

Group the Objects
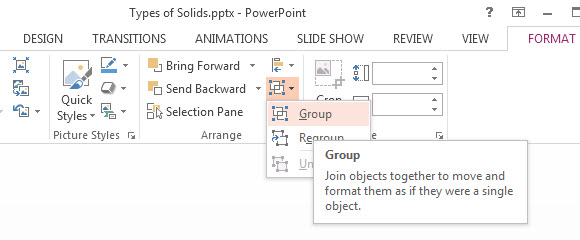
Once you have manually selected the objects, group them by clicking the FORMAT contextual tab. Now click the Group objects button under the Arrange group. A menu is visible with three options: Group, Regroup, and Ungroup. Select he Group option.
An alternate way to group objects is to Right-Click one of the selected objects. Point to the Group option, and select Group.
Ungroup the Objects
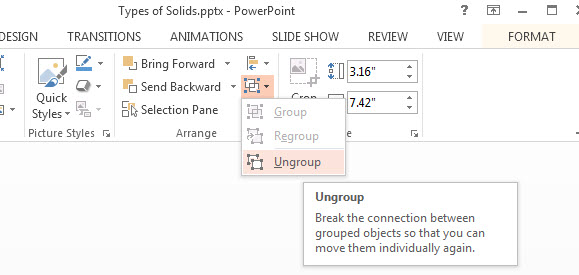
In case you need to make a change to a specific object of a group, Ungroup them. You can later Regroup them. Do this by clicking the FORMAT tab. Now click the Ungroup option from Arrange group. This allows you to treat the objects as independent ones.
An alternative way to Ungroup objects is to Right-Click one of the objects in a group. A menu appears. Move the mouse pointer to Group. A submenu appears. Now click Ungroup. Objects are no longer attached.
Just like the Group Objects in PowerPoint 2013 tutorial, there are other Presentation Tips available for free.
Leave a Reply