
Proofreading is an important final step in making any presentation. All too often, people are not very critical of their own writing. Therefore, they end up missing spelling and grammar errors.
So, if PowerPoint fixes these mistakes automatically then it becomes a huge time saver for the presenter.
Proofing options are available in PowerPoint settings. Here, we will get the settings and what they do.
What is PowerPoint proofing?
Proofing is an important feature which allows us to automatically correct and format text in PowerPoint presentations. This feature includes automatic spelling and grammar checking for text included in the slides.
How to Access Proofing Options in PowerPoint 2013 and PowerPoint 2016?
PowerPoint allows you to change proofing options. It allows you to customize the settings as you see fit. You can access proofing options by following these steps:
First, click the File tab on the Ribbon toolbar
Select Options as shown in the image below

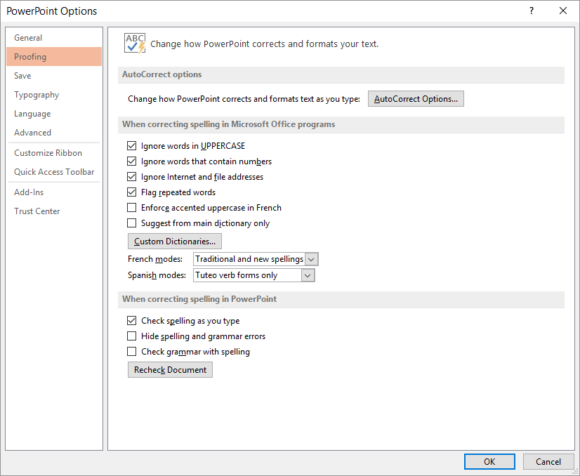
Select Proofing from the PowerPoint options. All the proofing options can be changed from here.
How To Turn on Spelling and Grammar Check?
First, click the File tab on the Ribbon toolbar
(Please click here to download the PowerPoint Template used in this example)
Select options as shown in the image below
Select Proofing from the PowerPoint options. All the proofing options can be changed from here.
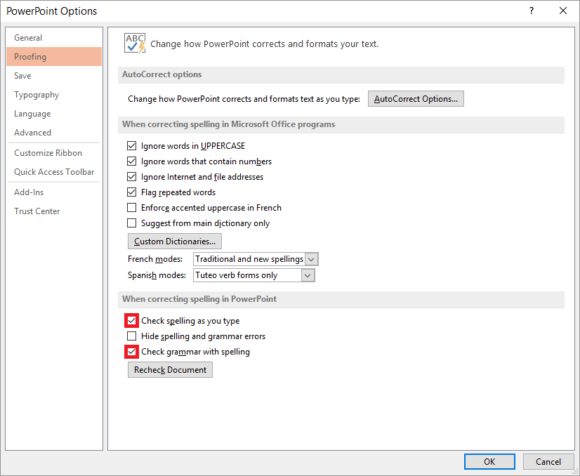
From the Proofing tab in the PowerPoint options, make sure to check the box labeled Check grammar and spelling to have PowerPoint point out spelling mistakes.
You can also check Check spelling as you type to have a red line appear below text with incorrect spelling.
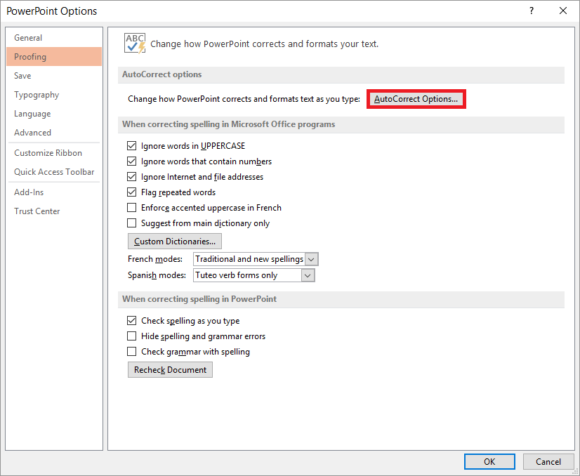
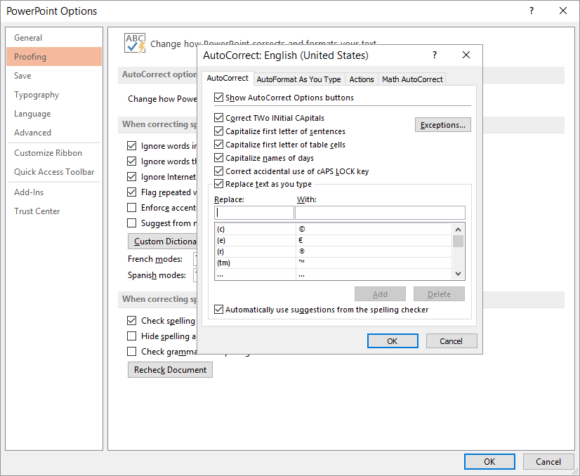
Click the AutoCorrect Options… button to see the settings that PowerPoint uses to correct the text Formatting as you type.
It should look something like this
If you’re annoyed by some of these automatic replacement settings, then now you know where to disable them.
Leave a Reply