The transition effect provides an animation, as you advance from one slide to another. PowerPoint 2013 has an intuitive interface for applying transition effects to free PPT presentations and specifying their triggers. You can apply effects to an individual slide or the entire presentation. Let us learn how to apply transition effects in PowerPoint 2013.
Apply To an Individual Slide
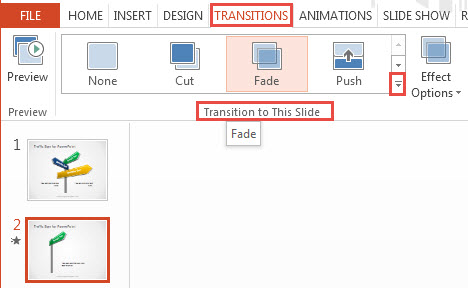
This comes in handy when you only want to apply the effect on a single slide. This also gives the option to apply different transition effects to different slides. Select the slide i.e. slide 2. Hold down the <Shift> key, and select any number of slides. Locate the Transitions tab on the PowerPoint Ribbon and click it. Under the Transition to this Slide group, click the more option (downward arrow). A gallery appears. Choose from exciting, dynamic, and subtle effects.

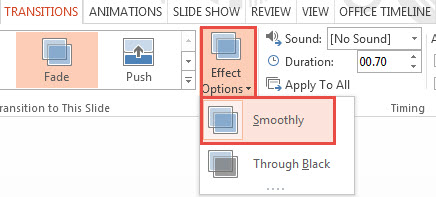
View possible variations of the selected transition effect by clicking the Effect Options button.

Apply To All Slides
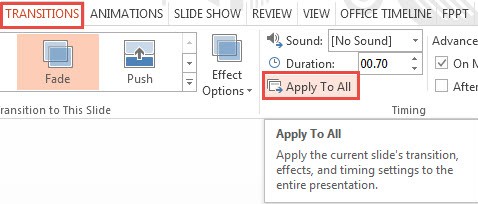
There are two ways of applying the same transition effect to all slides. For method one, select a single slide, apply the transition as mentioned above. Now navigate to the Timing group and click Apply to All. You may select a particular sound played upon transition, or the duration of the transition animation. The transition effect and timing setting is applied to the entire presentation.

Remove Transition Effect
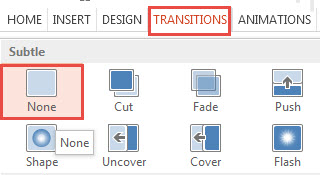
This gives you the option to remove the effect from a single slide or the entire presentation. To remove the effect from a single slide, navigate to the Transition tab, followed by the Transitions group. Now click the None option from the gallery. To remove the effect from all slides, just click repeat the procedure and click Apply to All in the Timing group.

Now you know how to apply transition effects in PowerPoint 2013. In the demonstration, the free PPT template used was free Traffic Signs PPT theme.

Leave a Reply