Insert audio to give your presentations a voice. A useful part of handouts, online presentations, and vocational courses from distance learning centres, do it by three ways: insert from your PC, record audio or search online. Learn the shortcut way of how to insert audio in PowerPoint 2013 with picture illustrations.
Insert an Audio File
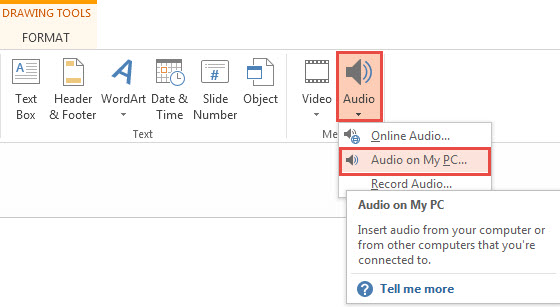
Click the required slide. Now, click the PowerPoint Ribbon, followed by the Audio button in the Media group. Upon clicking, a dropdown menu appears, click Audio on My PC. Likewise, if you are inserting an Online Audio clip, press the Online Audio button.

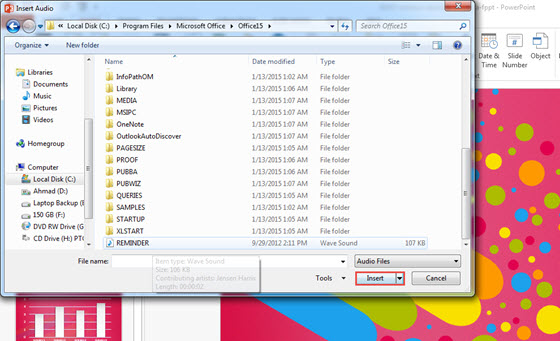
Now, browse your computer, locate the audio file and click the Insert button. PowerPoint 2013 supports audio formats, such as: AIFF, AU, MIDI, MP3, WAV, and WMA. Alternatively, you may record the audio, or insert audio from Microsoft’s online library.

Automatic / Manual Playback
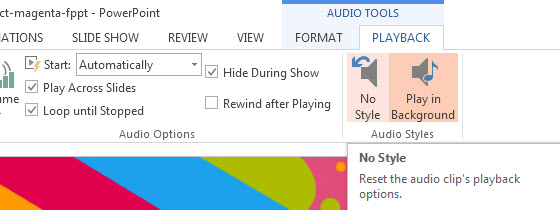
Navigate to the slide. Click No Style to disable any styling options. With No Styling, the audio will start on clicking the audio button. To play the audio automatically, click Play in Background.

Below shows the Audio icon that appears during a presentation if manual playback is applied. Click this button or click the arrow sign to play the audio.

The above tutorial describes the basic task of inserting audio in PowerPoint 2013. You may learn advance Media techniques and learn how to Work with Objects too.
The tutorial was made using an abstract template, which you can use in Art school, So, download free Pink Rainbow Abstract PowerPoint template.

Leave a Reply