Many people like using laser pointers to highlight important points on the projector screen. It help you point to something without having to walk in front of the projector. A very nice tool considering they’re usually really cheap. But, did you know that you don’t necessarily need to buy one at all. You can turn your mouse into a laser pointer. This is also the only way to point things out in web based presentations instead of using the mouse. Here, we will talk about how you can use this feature.
How To Use The Laser Pointer Feature in PowerPoint 2013
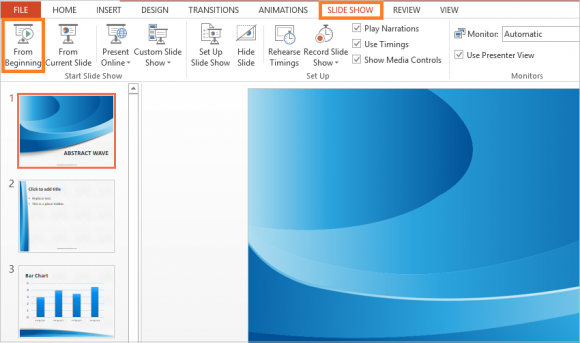
You can use it in Slide View and Reading View. To see the laser pointer in “Slide View”, click Slide Show from the ribbon, and click the button labeled From Beginning. You can also just press F5

Now, hold Ctrl and click the Left mouse button to make the laser point appear on the screen. If you keep holding Ctrl and the Left mouse button, then people won’t be able to see the mouse pointer anymore.
You can do the same for the “Reading view” by clicking View from the ribbon, and then clicking Reading View. Now, just keep holding Ctrl and the Left mouse button to use the laser.
How To Change The Color of the Laser Pointer in PowerPoint 2013?
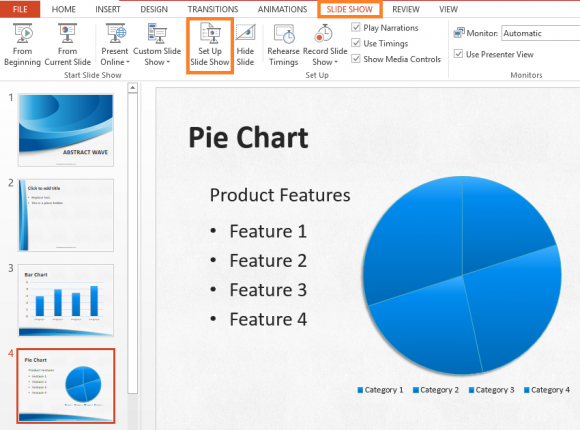
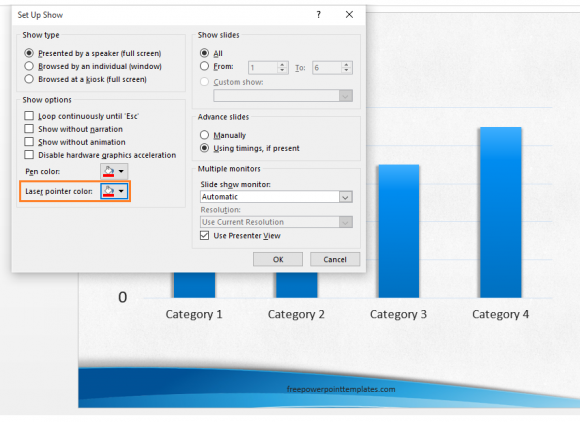
You can change the color of the laser if needed. Click SlideShow from the ribbon, and click Set Up Slide Show.

Here you can choose any color you want. After you’re done selecting the color, click OK.

Recording Laser Pointer Movements
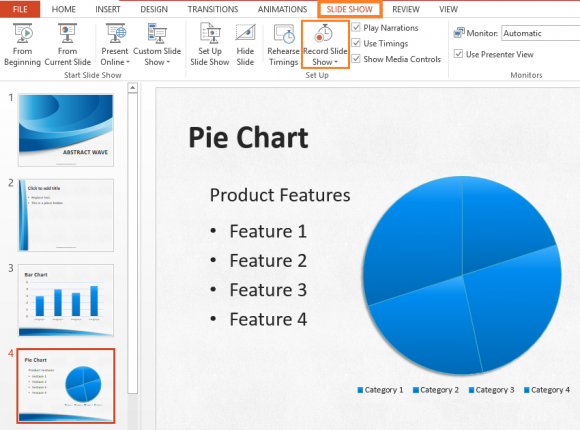
Finally, you can also record the movements of the laser pointer. This is usually done when recording a narration for the presentation. You can read more about about narrations and timings by clicking here. Click SlideShow from the ribbon, and click Record Slide Show.

Click Start Recording to Begin recording laser pointer movements.
Image Courtesy:
Q-LINE Laser pointers by 彭家杰 [CC BY 3.0] via Wikimedia Commons

Leave a Reply