Text slides play an important role in any presentation. Without them, we would not be able to lay out information in detail. But, no one likes to see multiple congested lines of text in PowerPoint slides. That is where an Indent can really help make text look more presentable.
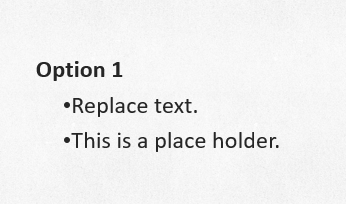
Example of Text That Needs an Indent
Text that has indentation issues is formatted poorly. This text is usually copied from a PDF file, Word document, or another Presentation. Poorly made presentation templates can also cause text to be too close to bullet points.

What Is an Indent?
An indent is simply a margin that creates empty space between text and something else. For example, in this case between a bullet point and a line.
Where To Change Indent Settings in PowerPoint 2013?
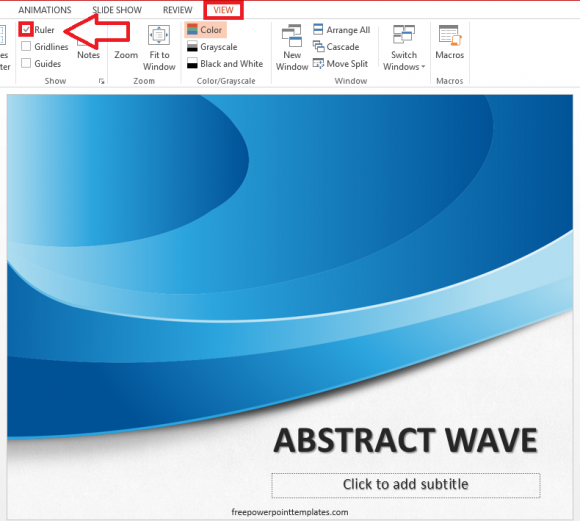
Indents can be changed with the ruler. The Ruler is usually hidden in newer versions of PowerPoint. But, you can un hide it by using these instructions:
Click the View tab in PowerPoint 2013, and check the box labeled Ruler as shown below.

(Click Here to download the Template used in this example.)
How to Use The Ruler in PowerPoint?
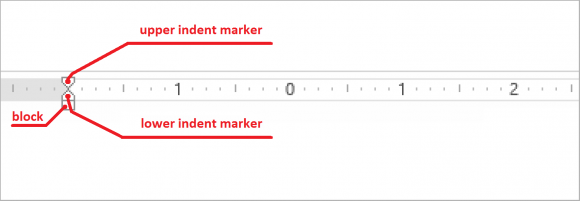
The ruler works about the same in all versions of PowerPoint. First, select the text you want to move. Then, move a tab on the ruler to move that text (or object).

(This example is from PowerPoint 2013)
The grey area on the left is beyond the margin. Hence, it will not be visible after editing. Drag the upper indent marker to move the start of the text you selected. And, Drag the lower indent marker to move the end of the text.
How To Use a Ruler to Fix Bullet Point Indents?
Let us revisit the bullet point list which needs its indents corrected.

Text is too close to the bullet point. We can fix this by using the ruler. First we un hide the Ruler using the instructions given above.
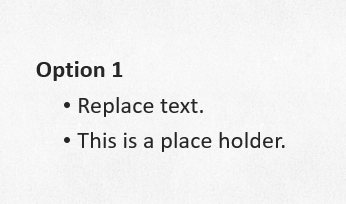
After that, we highlight the text we want to move, and simply drag the upper indent marker to move it. Dragging the lower indent marker will move bullet points and lines at the same time.

And there you have it! Indents fixed with ease.

Leave a Reply