People often need to use a custom show when delivering different versions of the same presentation to different audiences. Expectations of different audiences and their varied levels of knowledge about the topic make it difficult to use the same version of the presentation with different audiences. Making a custom slide show allows you to use the same presentation file to give custom presentations, each tailored to a specific audience.

Editing Is Simpler in Custom Shows
Of course, you can make a folder and keep multiple similar PowerPoint files for different audiences. If you make multiple files, editing is a fuss. You’ll have to edit information in the slides of each file separately. With a custom slide show, you’ll only need to edit once.
Follow These Steps To Create A Custom Slide Show in PowerPoint 2016
Open your presentation in PowerPoint, and follow these steps:
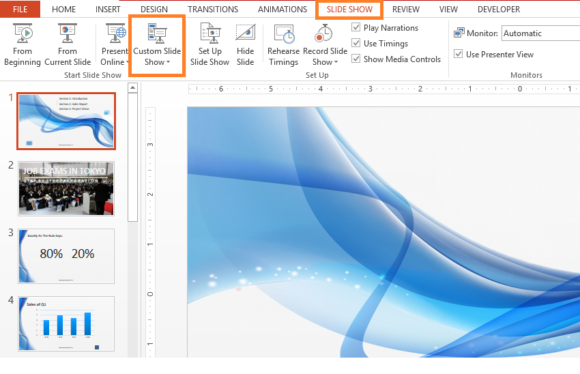
Click Slide Show tab on the Ribbon toolbar and then click the button labeled Custom Slide Show as shown in the image

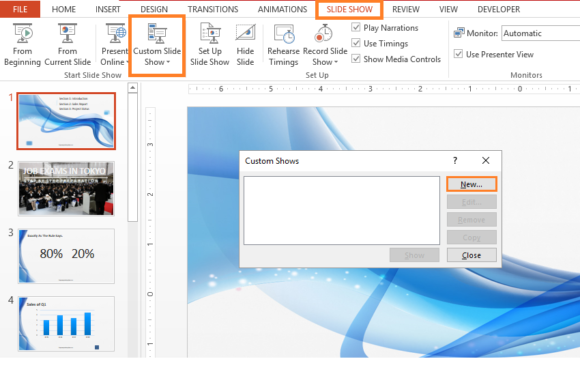
A little box labeled Custom Shows should appear. Click it to continue.
Click New to make a new custom slide show

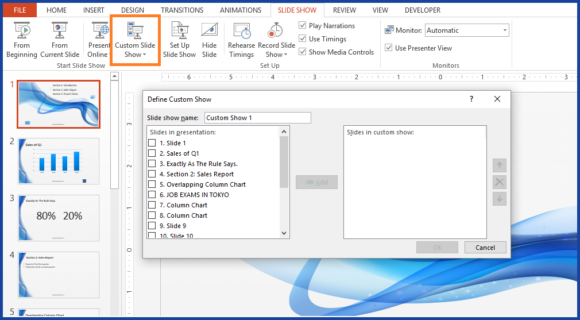
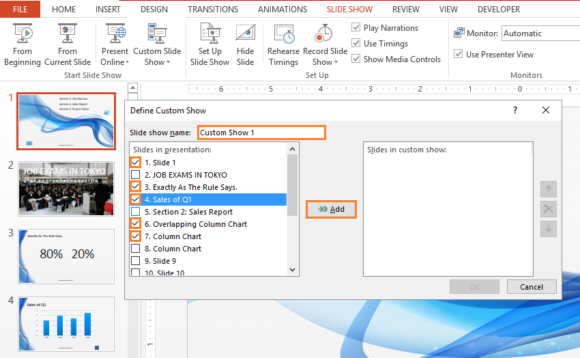
In the next box, you can choose the slides that you want to include in your custom slide show. You can also choose a name for this slide show.

Click Add to includes slides, and click the ↑ up and ↓ down arrows to change the position of slides in the custom show.
Click OK to create the new custom show. After that, click close and watch your custom show. You can change the position of any slide you want. You can also create many different Custom shows and label them appropriately for your convenience. Click here to learn more about using custom slide shows.
If you liked this article then please share and comment below. Good Luck and Have A Nice Day 🙂

Leave a Reply