When you scan your own images or take your own pictures, you may end up with something that does not look that good. Images in general can look different than expected when shown on a projector screen. Problems like this are usually caused by the resolution of the image. Preparing images before using them in a PowerPoint presentation fixes these problems.
Resizing Images In PowerPoint
Using a 15MB photo you took using a camera results in a 15MB increase in file size of the PowerPoint presentation. This image may have a lot of detail in it, but most projector screens are not that high resolution. Moreover, you generally don’t need really high resolution versions of images in presentations. So, what should you do?

(To download the PowerPoint template in this image, click here)
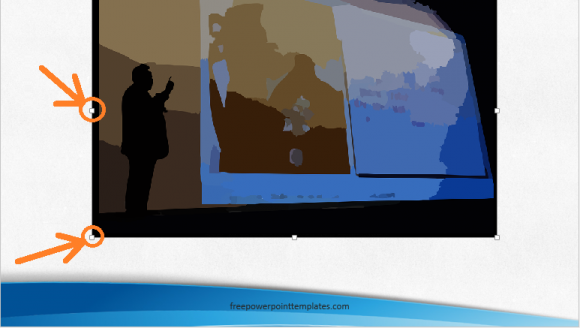
You may have tried resizing the image by using the white squares on the parameter of the image. The image certainly gets resized, but its file size does not change, only its appearance on PowerPoint changes.
Preparing Images by Compressing Them in IrfanView
Optimizing a presentation’s size makes it lighter, faster, and also makes it easier to send the presentation to someone else as an email attachment. There are two ways to make images in a PowerPoint presentation smaller. Either compress images using image conversion software like IrfanView or use the image compression feature in PowerPoint 2016.
IrfanView is a simple and easy to use software program. It allows you to add multiple images in many different formats and convert them all at once. To can convert to any commonly used image format like jpeg or png.
Preparing Images by Compressing Them in PowerPoint
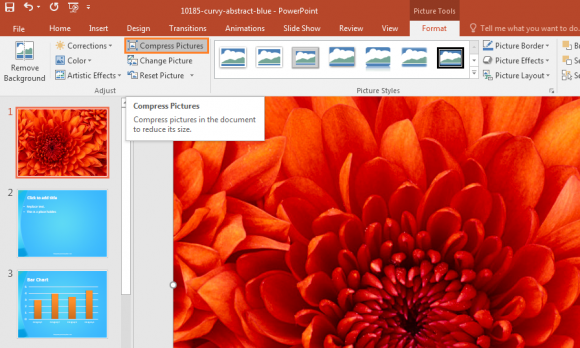
It is easy to compress images directly from PowerPoint 2016. Copy the PowerPoint presentation first or save it as a working copy. Compress and reduce the size of all pictures in the document by clicking the image in PowerPoint. This will show the Format toolbar on the ribbon automatically. Then, click Compress Pictures.

It will give you different options to compress the image. Choose one that suits you and click OK. In most cases you will notice that even choosing the lowest of the three options does not impact the picture quality too much. You can check to see how different the image looks after compression by comparing the original with the compressed version.

Leave a Reply