Although images and visuals get a lot of attention, text still plays an important role in PowerPoint. Presenters need to remember that it is text that gives meaning to the slides especially in case of business presentations. That being said, presenters don’t need to pay attention to all the text in the presentation, only important keywords and phrases. Text can look pretty awful of the spacing isn’t correct. One tool that can prove indispensable to editing text is the ruler. Today, we will talk about how to make it appear and how to use it in PowerPoint.
How To Show The Ruler?
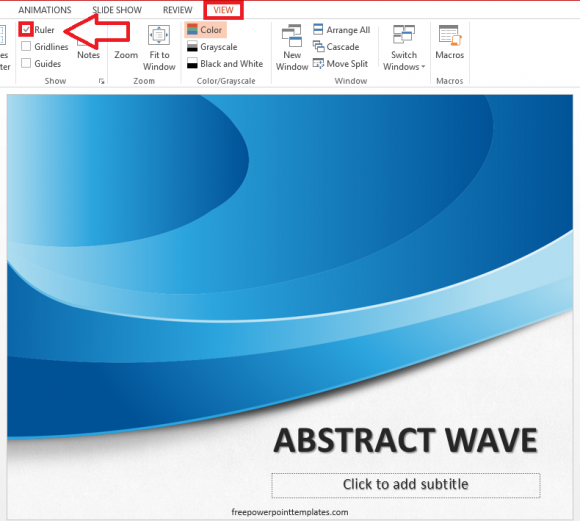
In old versions of PowerPoint, we used to be able to see the ruler all the time. But, in recent versions of PowerPoint, you have to make it appear from the View tab on the Ribbon Toolbar. Click the View tab, and check the box labeled Ruler as shown below.

(Click Here to download the Template used in this example.)
How to Use The Ruler in PowerPoint?
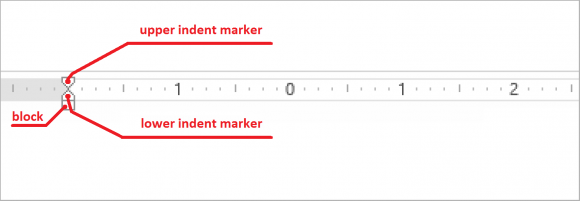
Using the ruler isn’t all that different across different versions of PowerPoint. The grey area on the right is beyond the margin. To move an object or text, select it. Then, click and drag the upper indent marker to move the starting point of the text. You can use the lower indent marker to move the ending point of the text.

(This example is from PowerPoint 2013)
In Case of a Paragraph
Click and drag the upper indent marker to move the first line of a paragraph. Click and drag the lower indent marker to change the left margin of the paragraph. You can move both the first line of the paragraph and the left margin by dragging the block on the ruler.
In Case of a Bullet Point
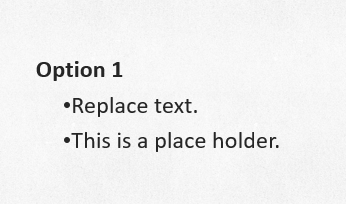
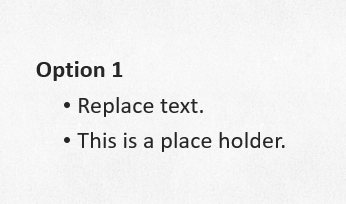
If text in a bullet point list is too close or too far from where it should be, then you can use the ruler to fix this.

Select the lines in the bullet point list and drag the upper indent marker to move the lines. You can use the lower indent marker to move both the lines and the bullet point formatting at the same time.


Leave a Reply