Make a positive impression on your audience by proofreading the presentation. Poor spelling, especially in the slide title, leaves a bad impression. People may not take your presentation seriously, if there are spelling errors. Spell Check in PowerPoint 2013 takes a look at ways to correct the spelling in no time.
Spell Check the Entire Presentation
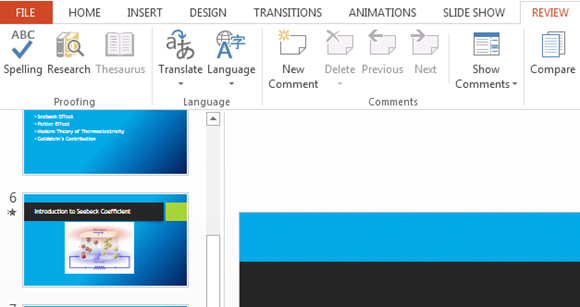
Navigate to the Review tab on the Ribbon, and click it. Click the Spelling button under the Proofing button on the left to spell check the entire document manually. The spelling check starts from the location of the cursor. The keyboard shortcut to turn spell check on is F7.

Using the Spelling Pane
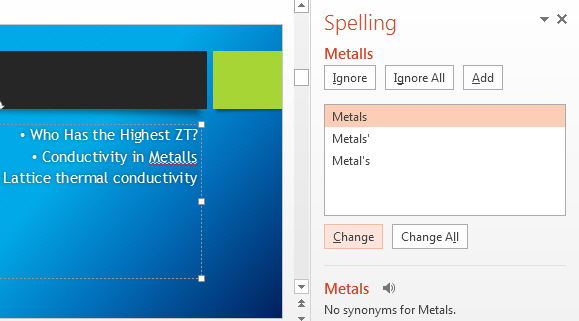
When a spelling mistake is identified, the Spelling pane appears on the right-hand side of the work area. The Spelling field shows the misspelled word along with possible options. The user can choose to Ignore the mistake, particularly, if it is a name. The Ignore option only accepts a single occurrence of a word, which means that future occurrences will be deemed incorrect. Ignore All accepts the current spelling for the rest of the document. Change option changes spelling to the one in the Suggestion list. Change All changes spelling for the entire presentation.

Spell Check Each Word Separately
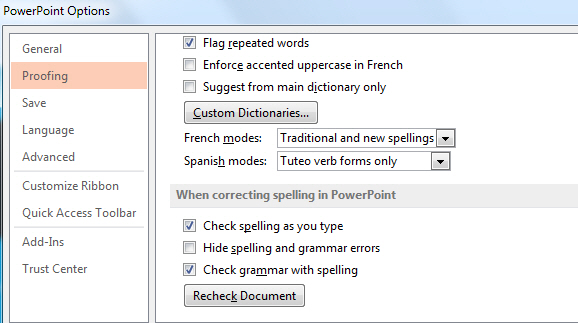
You can toggle the Proofing options in PowerPoint by clicking on File from Quick access toolbar, followed by Options, and then Proofing. Click on the check box that reads “Check spelling as you type” to turn on the spell check. Spell check corrects spelling mistakes as you type. Misspelled words are underlined in Red. Once you select a particular word, the Spelling pane automatically appears. In addition, Click on the box box that reads, “Check grammar with spelling” to make sure there are no grammatical errors in the presentation.

The instructions provided in this tutorial are also applicable to PowerPoint 2010 and PowerPoint 2007, while slight differences in menus and options is expected. Browse free PowerPoint backgrounds to add a spark to the presentation.

Leave a Reply