People use PowerPoint to make and share presentations using text and images. Very often, people will make presentations using text and almost no images of their own. You should be using relevant images to make the presentation more attractive to the viewers. Of course, using copyrighted images from the internet is a big no no.
Using Photographs In PowerPoint
Most people use free and paid stock images from the internet. Some people also use photographs, but few people use them correctly. These photographs add a personal touch to the presentation. They can look pretty amazing and they’re fun to use in a presentation if you know how to avoid certain annoying issues. We’ll be discussing them here.
The Files Are Too BIG
When people take pictures using a camera (or scan them using a scanner), the pictures are usually huge and take a lot of MegaBytes. These images are largely uncompressed as well. Using a few of these images can make the presentation file really bulky. This also makes the file unsuitable for sharing across the internet as an email attachment.
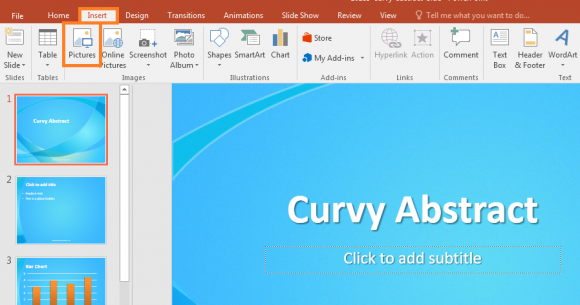
You can insert images in PowerPoint 2016 by clicking Insert > Pictures
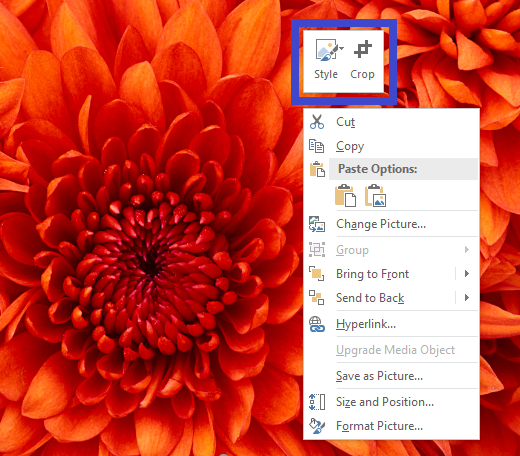
Most versions of PowerPoint are bundled with a light image editor. In PowerPoint 2016, you can see basic image editing options by right-clicking an inserted image.
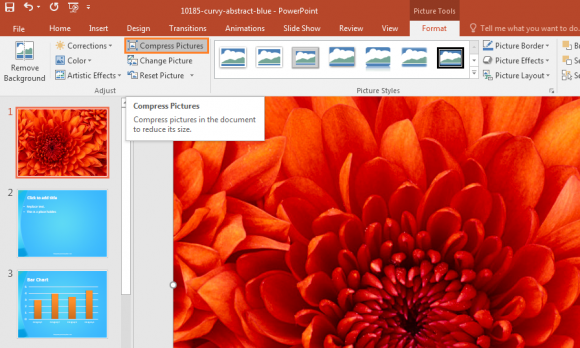
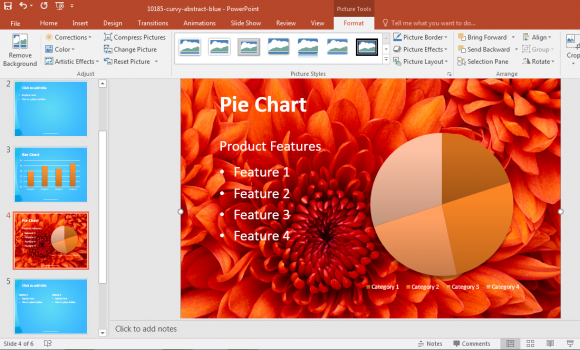
You can compress an image by clicking the inserted image and clicking Compress Pictures from the ribbon.
If you want to compress many photographs in a batch before using them in PowerPoint, then consider using IrfanView or any other image compression tool to compress files. You can also find many other useful options in the ribbon, including crop, border, and effects.
Photograph Image Formats
You can insert pictures of many different image formats in PowerPoint 2016 including JPG, GIF, PNG, BitMap, PICT, TIF, and others. The JPEG and PNG formats are usually best when it comes to compression and file size reduction.
How To Use Your Photograph In The Background
This is pretty simple. Insert an image into the slide. Right-click the image and click Send to Back.
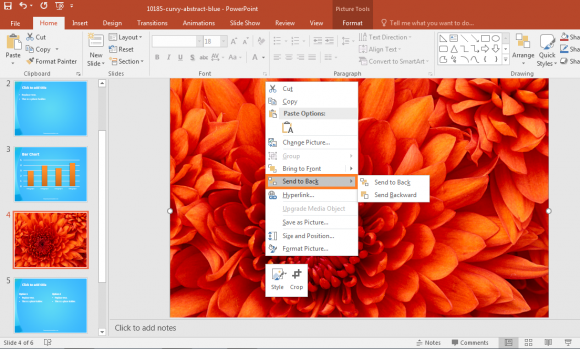
Your selected images should go into the background.
If you’d like to use the PowerPoint temple featured in this tutorial, you can download it by clicking here.

Leave a Reply