There are other ways than manually applying borders and shading to spruce up the appearance of a table. PowerPoint comes with ready made visual styles to give tables a professional look. Learn how to Apply Table Styles in PowerPoint 2013 with this 2 step guide.
How To Apply Table Styles
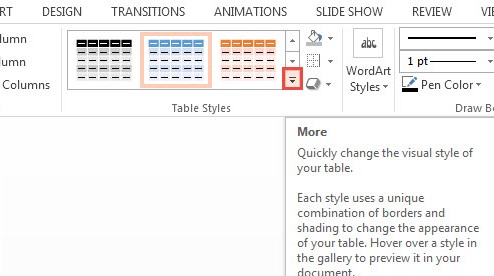
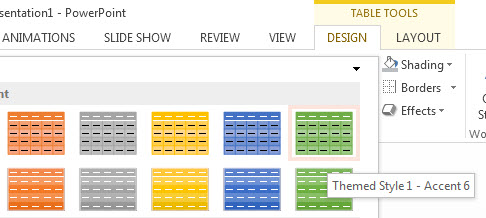
Click or Select a Row or Column of the table. Navigate to the DESIGN tab on the Ribbon and click it. Now navigate to the Table Styles group and click the button that looks like a download arrow. A number of visual styles appear in the Table Styles gallery, categorized under: Best Match, Light, Medium, and Dark. Click the most suitable one. As a result, the style is applied.

The choice of style varies by the table content and slide background. You may hover across different styles to view their preview before applying. Additionally, download a free Tan PPT template with a 4×3 table to find out which layout works best.

How To Remove a Style
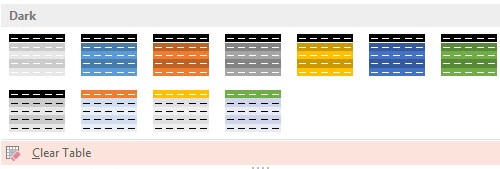
To remove an applied or existing style, click anywhere on the table. Click the DESIGN tab, followed by the More button, found in the Table Styles gallery. At the bottom of the gallery, you see the Clear Table option. Click it to remove styling from the table.

The above tutorial explains how to Apply Table Styles in PowerPoint 2013. Applying visual styles to a table saves you from the time and effort required in manually applying borders and shading. It is all done through the Table Styles gallery found in the DESIGN tab. This concludes the how to articles on creating and formatting tables.

Leave a Reply