Save yourself from the hassle of formatting a chart every time you make a presentation with the help of chart templates. Table templates serve as guides for creating and reusing a table. This article on How To Create chart templates in PPT 2013 goes through the process of saving a chart style and applying it to new templates. This gives you the option to reuse the custom-made charts in future projects.
How To Create a Chart Template
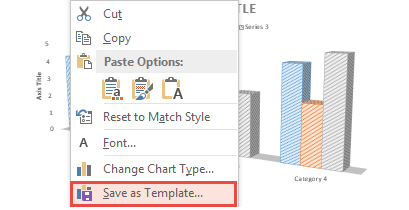
When you are ready to save a chart, Right Click on the free space inside the chart boundary. A contextual menu appears. Click the Save as Template option. Save the template in default location for future use. Click OK.

How To Apply a Chart Template
Create a chart. Click the DESIGN tab, which is under CHART TOOLS. Now, apply your earlier made template by clicking the Change Chart Type button.

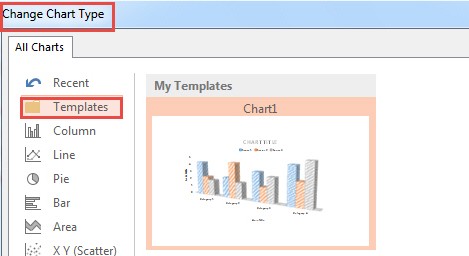
The Change Chart Type dialog box appears as seen below. Click the Templates option. This lists the templates made by you. You have the option to import ready-made charts into the My Templates list. Do this by clicking the Manage Templates button at the bottom of this dialog box and pasting templates into the default dictionary. You may start creating and applying templates by practicing on the free Yellow band PPT Theme.

The above PowerPoint 2013 tutorial explained How To Create PPT 2013 templates and how to apply them on existing content. Instructions involved saving with a Right Click and applying with the Change Chart type dialog box.

Hope this isn’t a repeat of my first message , great web site and love the free power point templates, I need all the help I can get in my informatics course.
I fowarded you to my twitter account thanks again. 🙂