You may add audio narration to a PowerPoint presentation for a few good reasons. Add narration to the presentation if it is going to be delivered online. Save it as a video and upload it to a video sharing website to share it with everyone, or share it privately and share the link of the video with people whom you want to show it to. You can choose to record narration to archive the presentation as well. A laser pointer’s movements can also be recorded along with the narration to point to things in slides as you record the audio.
How To Record Slide Narration in PowerPoint 2013
Narration can be recorded for some or all slides. Your computer must be equipped with a microphone. It is better if you have an external headset or a microphone connected to the computer to take a better audio recording. Make sure that the microphone is recording audio correctly before you start.You can test the recording capability of the microphone by using an audio recording application such as Audacity.
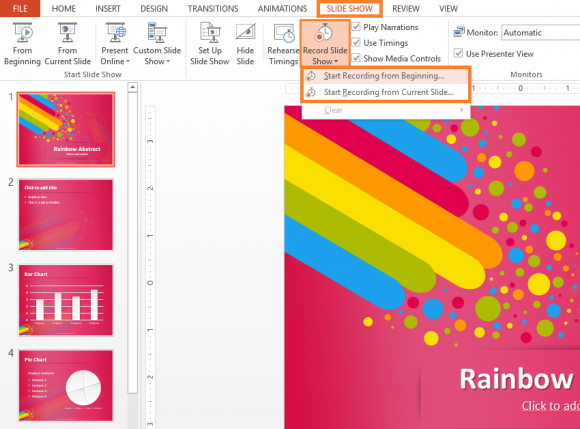
After you have your microphone ready, go to PowerPoint and click SLIDE SHOW from the ribbon, then click Record Slide Show and choose an option.

(Click here to download this PowerPoint template)
On the next dialog-box, click Start Recording, and make sure to choose the correct check-boxes. You can choose to record Slide and animation timings and/or Narrations and laser pointer movements using the check-boxes. Click here to learn more about the Mouse Laser Pointer feature in PowerPoint.
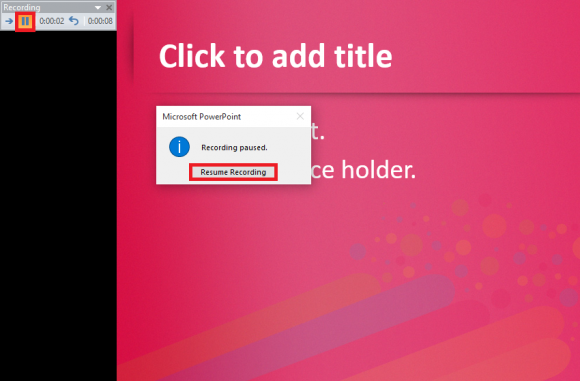
At any time during the recording of the presentation, you can pause the recording by clicking the pause button the the screen. Click Resume Recording to start recording again.

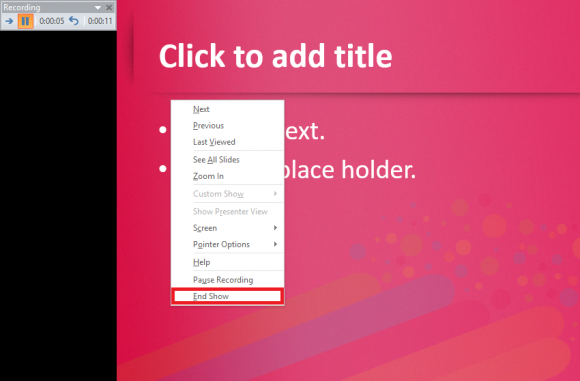
After you’re done recording the narration, its time to stop it. To stop the recording process, right-click anywhere on the screen and click End Show.

After the audio has been recorded, you should see a speaker icon on sides that include narration audio in them.


Leave a Reply