Learn how to Insert or Delete rows and columns in PowerPoint 2013 to modify a table according to your requirement. This will add cells to a table or delete existing cells that you do not need. At times you may also need to change the width or height of cells in a presentation.
How To Insert Rows / Columns
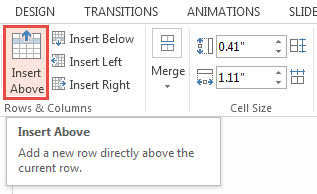
Highlight the row/column which is above or below the row where you want to insert the existing row/column. There are two ways of inserting a row/column, through the Right Click, or through the Ribbon. On the Ribbon, click the LAYOUT tab. Now click Insert Below or Insert Above. These buttons are found in the Rows & Columns group. Upon clicking, a row or a number of rows will be added, depending upon the number of rows/columns originally highlighted with the mouse. Similarly, the number of columns added to the Left or Right is equal to the number of columns highlighted upon making the change.

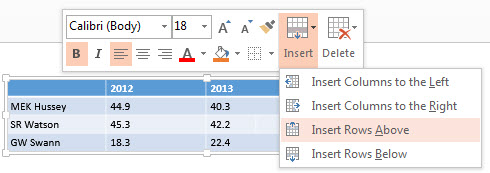
The quick way to insert a row or a column involves the Right Click. Simply Right Click the cell corresponding to which you would look to insert a row or column. A mini toolbar appears. Click the Insert button. A sub-menu appears. Choose the required option. You can practice modifying a table with the help of free Map presentation with a built-in 4×3 table.

How To Delete Rows / Columns
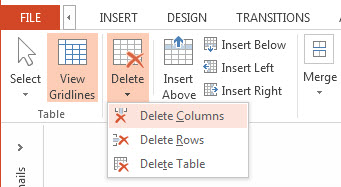
Highlight single or multiple rows/columns. Click the LAYOUT tab, followed by the Delete button (located in the Table group). Upon clicking the Delete button, a drop-down menu appears. You have the option to delete the number of rows/columns highlighted with the mouse, or to delete the entire table.

An alternate way to accomplish this is to Right-Click the selected rows/columns. Select Delete from the mini Toolbar. Choose from the available options.
Insert or Delete Rows and Columns in PowerPoint 2013 through the Ribbon or the Mini Toolbar. You may download a ready-made presentation template for free with a 4×3 table.

Leave a Reply