
Now, users can insert an image of their desktop or an open application without leaving PowerPoint. The screen image is known as a screenshot. This feature is especially useful, if you want to insert a diagram or a an image into a presentation slide. Users have the option to either insert the screenshot of an open window or a screen clipping. Learn How To Insert Screenshots in PowerPoint 2013 with the quick & easy way described below.
Open Window Screenshot
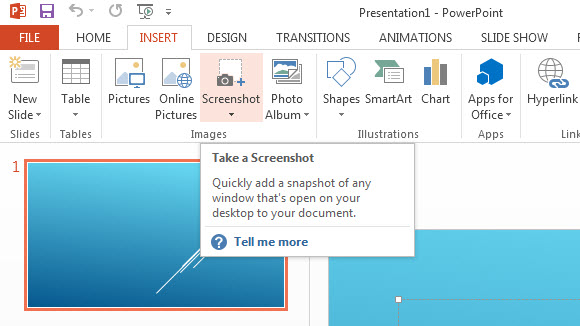
Navigate to Insert tab on the Ribbon and Click Screenshot in the Images group. A drop down menu appears showing all open windows. Click a window, and its screenshot will be inserted into the presentation. You may download an educational PowerPoint presentation to practice inserting screenshots.
Screen Clipping Screenshot
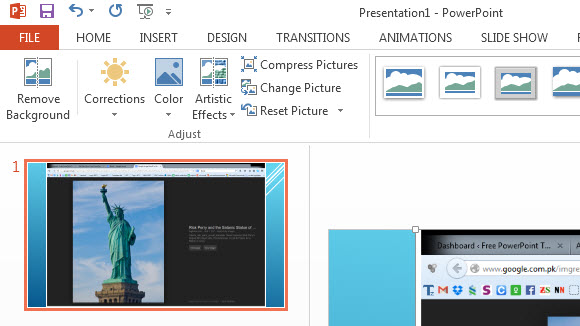
In most circumstances, it is preferable to clip a portion of an active window, rather than inserting a image of the entire screen. To accomplish this, minimize all the windows, except the PowerPoint program along with the window whose screenshot (screen clipping) you wish to take. Click the Insert button, followed by the Screenshot button. Select the Screen Clipping option. As a result, the PowerPoint window minimizes and a crosshair appears in place of the cursor. Select the area of the screen by dragging the crosshair to desired position.
To cancel the screen clipping process, press <Esc>.
The above instructions show how to insert screenshots in PowerPoint 2013. This is a part of a series of tutorials that explain how to work with objects in PowerPoint. To summarize, all you have to do is to press the Insert button followed by the Screenshot button. The instructions in this free theme for PowerPoint 2013 are also applicable to the earlier releases, such as PowerPoint 2010, but the instructions may wary slightly due to a change in layout.
Leave a Reply