
Understanding certain topics is easier when they contain screenshots. The presentations which make use of a website as source or demonstrate features of a software can really benefit from the use of screenshots. Using callouts on these screenshots will help people understand what exactly you’re talking about. What if you could take screenshots quickly and without having to install a new software on your computer?
A Tool Built-Into Windows 7 and Later Versions of Windows
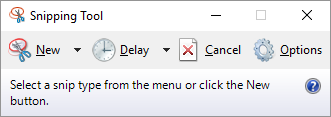
It is called the Snipping Tool and it is really easy to use. Its a great utility software. Its built into Windows 7 and later versions of Windows. All you do is click and drag to make a rectangle. The Snipping Tool will then take a snapshot of the area you highlight.
Use The Delay Feature To Capture Anything
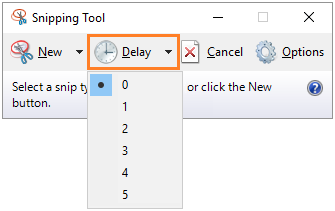
I wouldn’t really call this a drawback but when you click a drop-down menu or something similar. You can’t capture it without clicking the Snipping tool. Because, when you do, the menu disappears.
However, you can remedy this by using the Delay function. Just click the delay button and set an amount of time in seconds. Now, click New to make a new snapshot, it will wait x amount of seconds before capturing the screen. This means that now you can get ready before the snapshot is taken.
Adjusting The Size of The Image
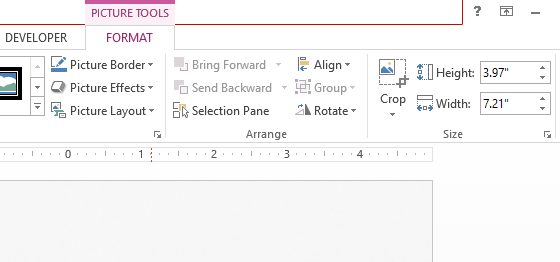
These screenshots can be fairly large at times. Thats why most people run into the problem of having to deal with large images that do not fit into their presentation slides. This is when you can use the Crop and Resize features in PowerPoint to make the image smaller.
You can find all the editing options you’ll ever need for the majority of PowerPoint presentations by clicking an image and then clicking the Format tab in the Ribbon Toolbar as shown below:
Leave a Reply