
Once you have figured out how to create a table in PowerPoint 2013, learn how to format its rows and columns. The act of merging combines two rows or more to form a single one. Merging cells also works for multiple columns. The reverse of merging is to split a single cell into multiple ones. The tutorial on How To Split and Merge Cells in PowerPoint 2013 assumes that the user is familiar with how to Select a single cell or multiple cells.
How To Merge Cells
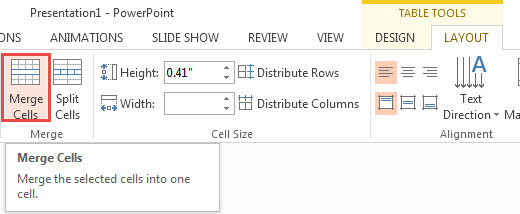
There are two ways of doing it, either through the Ribbon or the Contextual Menu. For method 1, select the cells (rows or columns) you wish to merge. Locate the LAYOUT tab, found on the Ribbon, under TABLE TOOLS. Click it. Now locate the Merge group, and click the Merge Cells button. This will merge any number of selected cells.
Another way to merge cells is to Right Click the selected cells. A contextual menu appears. Click Merge Cells. To practice merging cells, download a free PowerPoint presentation with a 4×3 table.
How To Split Cells
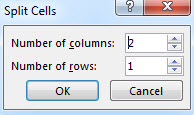
PowerPoint 2013 for PC allows users to split a single cell into multiple cells. To do this, give the Split Cells command. The command can be given in two ways: through the Ribbon, or the Contextual menu. To access the command through the Ribbon, first highlight the cell. Click the LAYOUT tab, followed by the Split Cells button (located in the Merge Group). Specify the number of columns and rows to split the cell into through the Split Cell dialog box. Now, click OK.
An alternative way to split a cell is to Right-Click the cell. The contextual menu appears. Click Split Cells.
The above How To article explained how to Split and Merge Cells in PowerPoint 2013 through the Merge group (located under LAYOUT tab) and through the Contextual Tab, which appears when you Right Click the selected cells.
Leave a Reply