
Previous tutorials about objects in a presentation illustrated how to insert Clip Art and Screenshots. Our current tutorial shows how you can insert a picture. Insert Pictures and Animation in PowerPoint 2013 allows its users to insert any of the supported graphics file formats. After inserting an image from the computer, the Format button helps polish it to fit the presentation style. The paragraph below explains how to accomplish this.
How To Insert Pictures and Animation
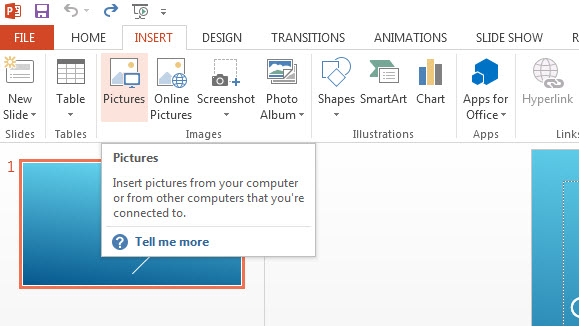
Click the INSERT button, followed by the Picture button in the Images group. Browse the image or animation from the Insert Picture dialog box. Click Insert after clicking the name of desired image. Users can insert one or multiple images by holding <CTRL> and selecting images one at a time. A couple of alternative ways to select multiple objects are highlighting with Mouse, or by holding the <Shift> key. Download free Family Pictures theme and practice inserting pictures.
FORMAT Tab
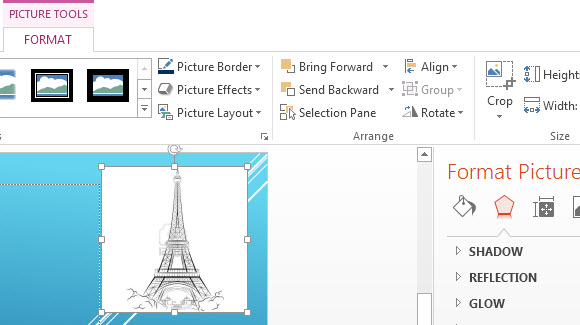
If you select an inserted image, the FORMAT tab appears under PICTURE TOOLS. To retouch or crop an image, Right-Click the image and click on Format Picture. From the Format Picture pane, you have access to editing options, such as Fill & Line, Effects, Size & Properties.
Features are not limited to inserting pictures, as users have options to modify them as well. To summarize, navigate to the Insert tab, and click Pictures. To edit the picture, Right Click on it, and select Format Picture. The instructions may vary for previous versions of PowerPoint, such as PowerPoint 2007.
Leave a Reply